Homemade magnetic stir plate
 If you want to grow your own yeast, a magnetic stir plate is a great tool. It keeps the wort (and any suspended yeast) in constant motion, improving the access of the yeast to nutrients, and optimizing gas exchange so that produced CO2 is replaced by fresh oxygen. Commercial magnetic stirrers are quite expensive, even second-hand, luckily they aren’t too difficult to make yourself.
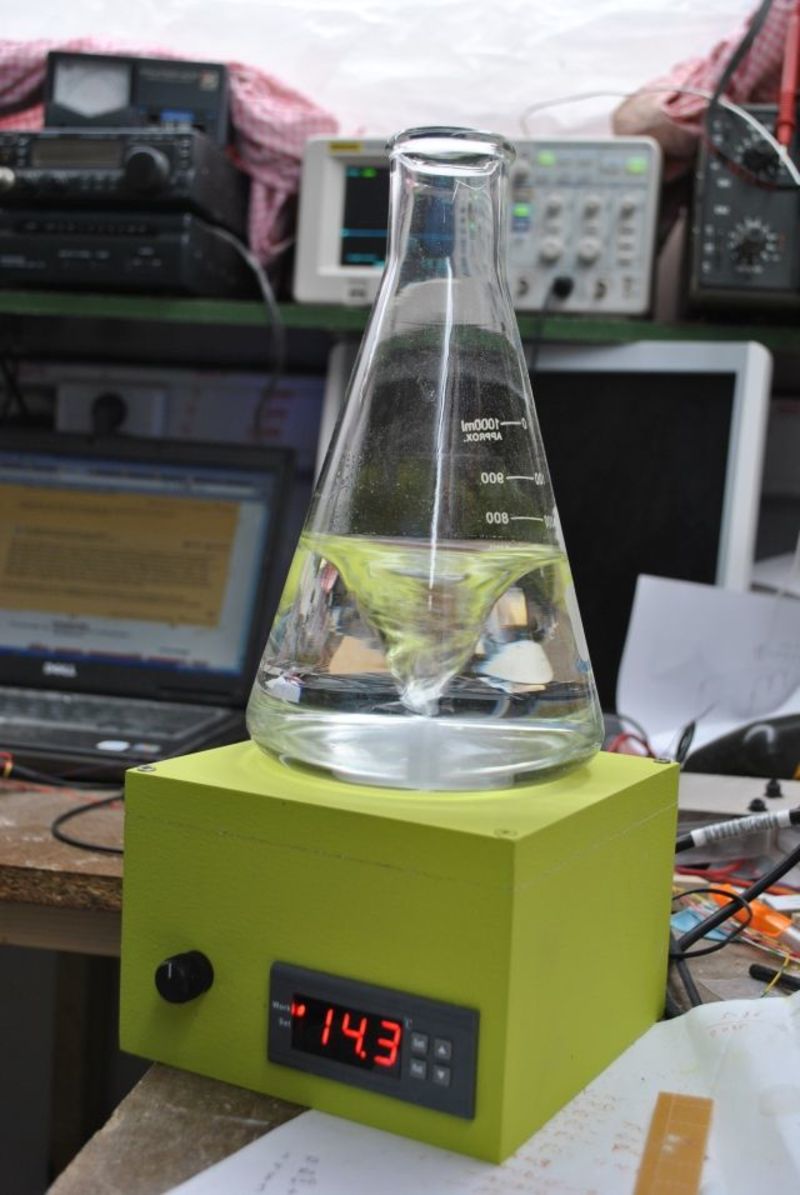
My magnetic stirrer is based on a 80x80mm computer fan. The stir speed can be tightly controlled using a PWM circuit. It has integrated heating which is controlled by a thermostat.
Stirring
Rotation
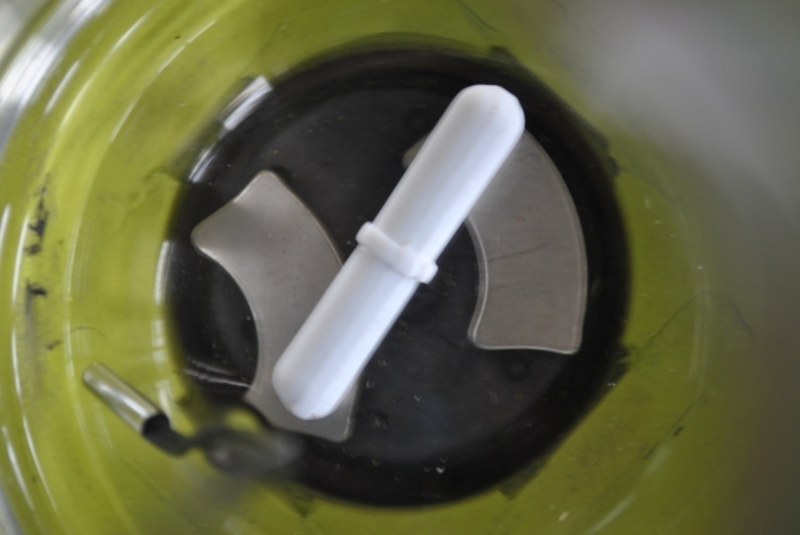
As mentioned the stirring action is driven by an old computer fan. I chose to remove the fan’s blades and glue the magnets straight onto the hub. This way the hub of the fan could be mounted in a cut-out in the plate’s top surface in such a way that the magnets are right under the stirred vessel’s bottom. This maximizes the magnetic force onto the stir bar.
Magnets
The magnets I am using were removed from an old computer hard drive. They are the permanent magnets against which the read/write heads actuate. Some careful placement and a few drops of super-glue later the magnets are permanently fixed to the fan hub.
It is important that the magnets are lined up with the stir bar, so that the magnets sit under the edges of the stir bar. This ensure maximum magnetic coupling. Stir bars come in different lengths and sizes (search eBay), the one I am using is 60mm long. This works fine for stirring a 3L Erlenmeyer. It has also successfully stirred a 5L yeast flask.
(on the bottom left of this picture the temperature controller’s sensor can be seen, dangling into the flask.)
Speed control
I found that some fine speed control is necessary to achieve the desired vortex. Too little rpm and the vortex will be too small, or the stir bar won’t even start spinning. Too much rpm and the stir bar looses lock with the magnets, causing it to fly out of control.
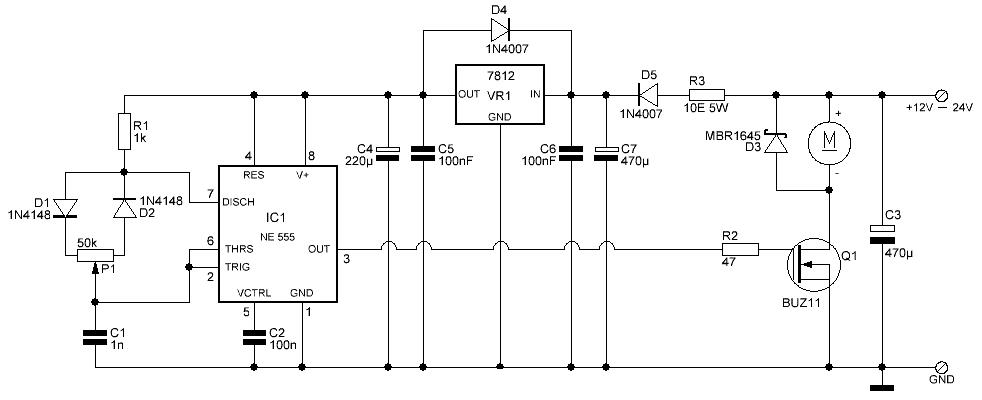
To allow for fine speed adjustments I chose to control the fan with a PWM controller. Controlling PWM is superior to regulating the voltage or current to the fan, since it allows the fan to keep maximum torque even at low speeds.
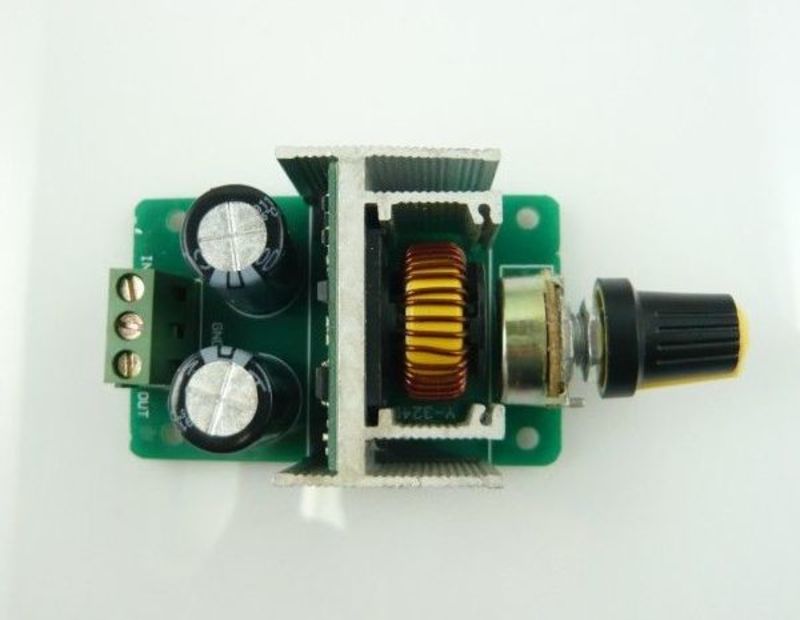
I built my own PWM controller, but since they can be purchased readily and cheaply on eBay (picture above) I recommend going that route. Any model that provides at least 2A should do the job. A potentiometer on the front panel of the stir plate controls the PWM, and thus the fan speed.
Heating
Heat source
The heating is provided by 4 wire-wound resistors which are embedded in the top surface of the stir plate. The top surface was routed out, filled with high-temperature stove sealant, and then the resistors were pressed in. After curing the excess sealant was sanded flat. The 4 resistors are wired in series and connected to the 230V power supply.
I wanted to provide about 40W of heat to the vessel. Given a voltage of 230V and keeping the current relatively low (170mA), this means that the total resistance should be around 1.322 Ohms, which is equivalent to four 330 Ohm resistors in series.
Temperature control
Temperature control is provided by a cheap digital temperature controller from eBay. It has a PT100 temperature sensor on a pigtail, and a relay that switches heating resistors.

Case
I constructed my own case out of left-over MDF. The wood was cut to size on the table saw, and glued using white wood glue. After sanding and filling, the case received several coats of paint (left-over from the kid’s room).
Bottom floor: electronics
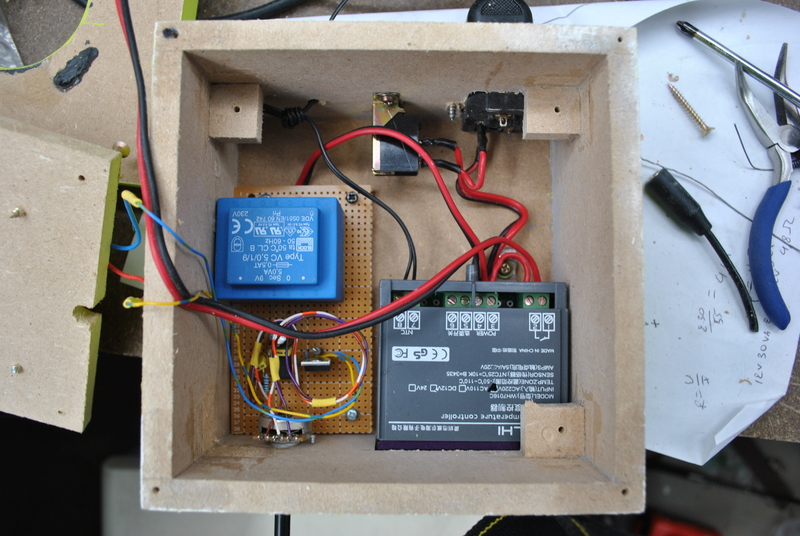
The bottom compartment houses the electronics, which isn’t much. On the left-hand side is a piece of strip board with the 12V power supply and the PWM converter. To the right is the temperature controller. On the top is a chassis connector for power (with integrated fuse) and a power switch.
Second floor: fan hub
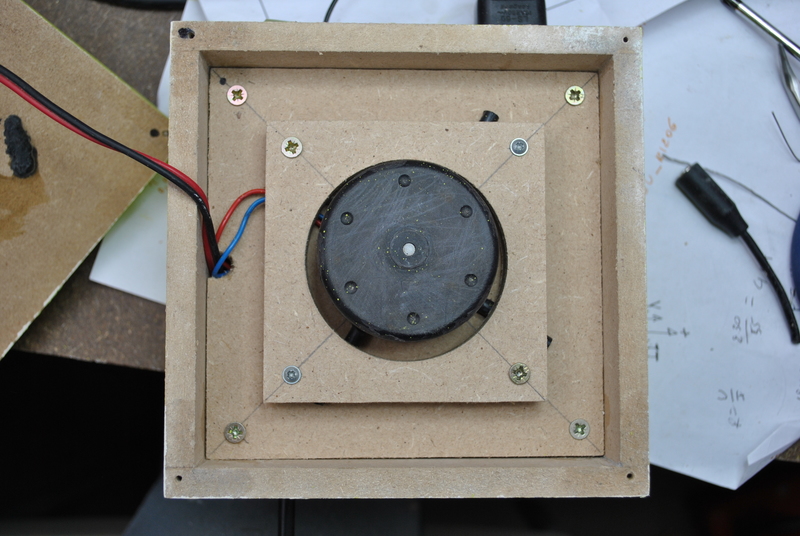
I divided the case in half by screwing in a piece of wood, which allows for easy mounting of the vandalised computer fan. When removing the fan’s blades and outer frame I took care not to damage the radial spokes. These now support the fan hub so that it sits level. A piece of wood with a cut-out for the hub clamps the spokes to the wood below.

Top floor: the magnets and heaters

Improvements
If I would make a new magnetic stir plate, I would make the following improvements:
- Heating is not necessary when used at room temperature - I found that the yeast is always a few degrees above ambient temperature due to some heat given off by the spinning fan.
- I would integrate the temperature sensor into the stir plate’s surface. The current version requires the sensor to be either in the medium (risk of contamination), or to be stuck to the side of the vessel (inaccurate and awkward)
- A glass top surface would be nice to avoid spillage from fouling up the stirrers’ insides.
Resources
Forum post with further details and discussion (Dutch)